Diving into History: Origins and Evolution of Japanese Bookbinding
Bookbinding is one of the oldest and most venerable arts associated with the preservation of knowledge and the communication of ideas. A particularly fascinating and unique form of this craft is Japanese bookbinding , which has a rich history and evolution over the centuries. In this article, we explore the origins and trajectory of Japanese bookbinding, delving into its distinctive techniques and cultural significance.
Table of Contents
A Glimpse of Origins
The roots of Japanese bookbinding date back more than a thousand years ago, during the Heian period (794-1185 AD). During this period, the Japanese adopted the Chinese practice of using scrolls of silk or paper to record important texts. These early bindings consisted of long strips of paper or parchment, with the text written vertically and tightly rolled.
However, the true flowering of Japanese bookbinding occurred during the Edo period (1603-1868 CE). It was during this time that Japan experienced a period of relative peace and cultural growth. Binding techniques evolved considerably during this period, with the creation of distinct and innovative styles.
Traditional Binding Techniques
One of the most striking characteristics of Japanese binding is the emphasis on simplicity and functionality. Unlike elaborate Western bindings, Japanese binding is often minimalist and based on folding, binding and fitting techniques.
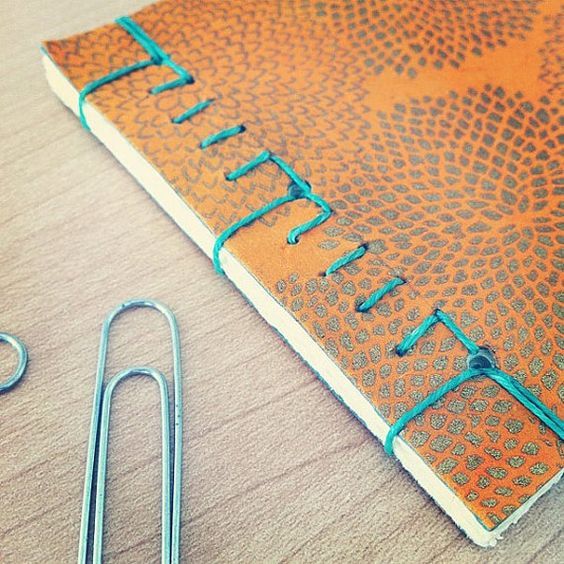
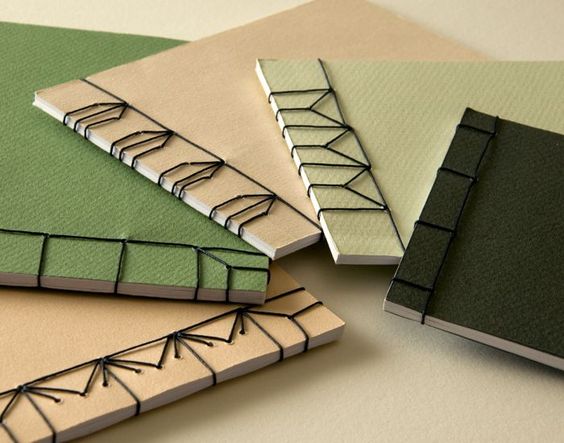
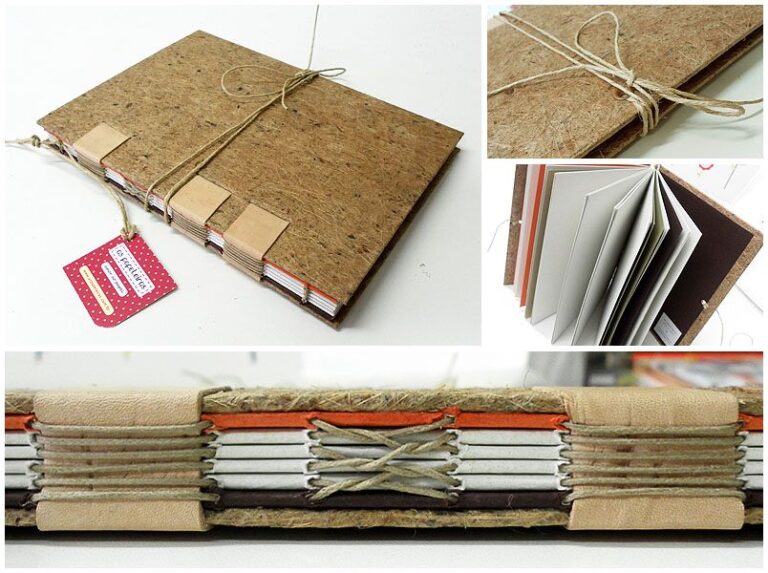
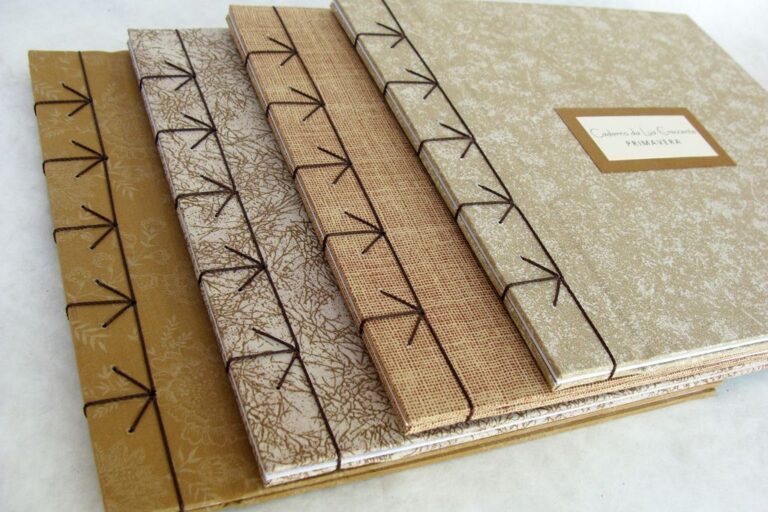
1. Koki Toji (Cross Stitch Binding): One of the best-known techniques is Koki Toji, where the book is stitched using threads or cords that create geometric patterns on the cover. This technique not only ties the pages together but also adds a distinctive decorative element.
It is characterized by the use of threads to sew the pages together, creating a book or notebook that opens completely flat, allowing easy reading and handling of the pages.
Here are some key features and steps of Japanese bookbinding (Koki Toji):
- Preparation of material: Before starting, you will need the sheets of paper that will make up the book. Make sure all sheets are cut and aligned evenly.
- Marking the holes: Use a template or ruler to mark the locations where the holes will be punched in the spine of the sheets of paper. The number of holes may vary, but it is common to use four to six holes.
- Drilling the holes: Punch holes at the marked locations with a punching tool such as a Japanese bookbinding needle or a bookbinding drill.
- Thread preparation: Cut a piece of Japanese binding thread, which can be silk, linen or nylon, and thread it through a binding needle.
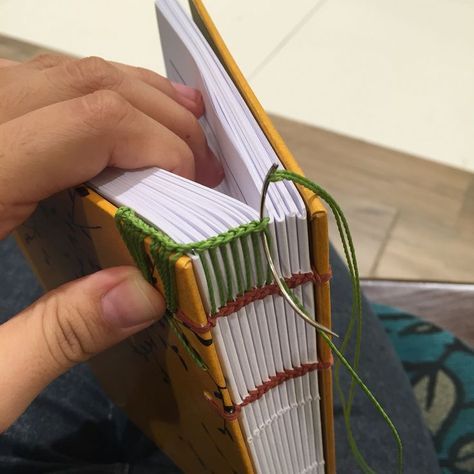
- Cross stitch: Start sewing at the bottom of the spine, passing the needle and thread through the first hole and pulling until there is a small end of thread outside. Then pass the needle and thread through the second hole, but this time from the inside out. Continue crossing the thread through the holes until you reach the top of the spine.
- Tying the wires: When you reach the last hole, tie the wires securely so that the binding is firm. Cut off excess thread.
- Finishing: If desired, you can add a hard or soft cover to your bound book. Decorate the cover according to your preference.
- Pressure and drying: Place your bound book under pressure to ensure the pages stay together tightly. Let it dry completely.
2. Yotsume Toji (Four-Point Binding):
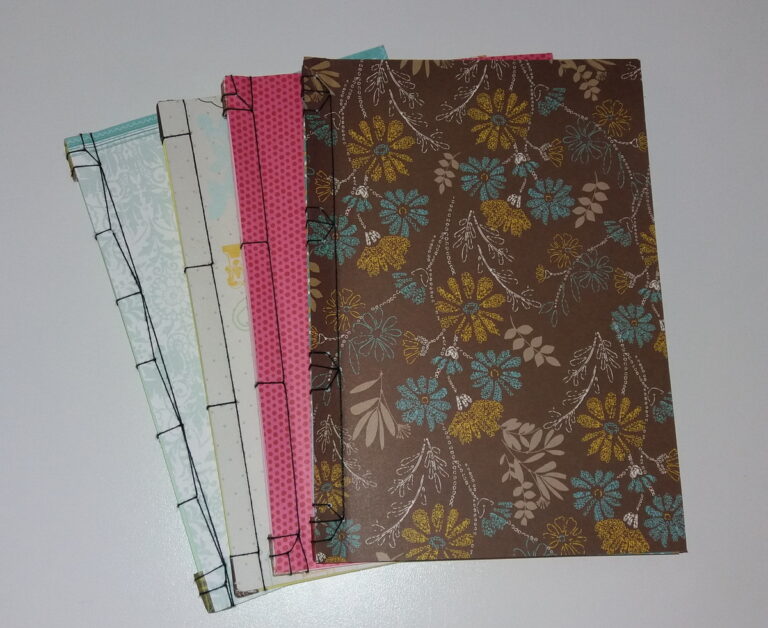
Yotsume Toji, also known as Four-Point Binding, is a traditional Japanese binding technique that stands out for its simplicity and elegance. This technique is used to create books or notebooks with a visible four-stitch stitching on the cover, which gives it a distinctive look and allows the book to open completely flat. Here are the basic steps to perform Yotsume Toji:
Necessary materials:
- Sheets of paper for book content.
- Two sheets of thicker paper for the covers (usually cardboard or thin cardboard).
- Ribbon or binding thread (usually silk or linen).
- Ruler and pencil.
- Knife or scissors.
Steps to perform Yotsume Toji:
- Preparation of the paper sheets:
- Cut all sheets of paper to the desired size.
- Fold the sheets in half to form notebooks.
- Preparation of the covers:
- Cut two thicker sheets of paper for the covers, the same size as the sheets of paper in the book.
- Decorate the covers as desired, as this is an opportunity to add a personalized touch.
- Hole marking:
- Use a ruler to mark the hole locations on the spines of the paper and covers. Make sure the marks line up so the holes match.
- Drilling the holes:
- With a craft knife or hole punch, make holes in the marked locations on the paper sheets and covers. Make sure the holes are aligned.
- Stitch sewing:
- Thread the ribbon or binding thread through one of the holes in the front cover, leaving a short end on the outside.
- Pass the tape or thread through the first notebook, starting from the outside and working towards the back cover.
- Return the tape or thread through the second hole in the notebook, toward the front cover.
- Continue this pattern, alternating between the front cover and the back cover, until all notebooks are secured.
- Pass the ribbon or thread through the last hole in the back cover and tie the ends to secure the binding.
- Finishing:
- Cut off excess tape or thread and adjust the tension to ensure the binding is tight.
- Pressing and drying:
- Place your bound book under pressure to ensure the pages and cover stay together tightly. Let it dry completely.
Yotsume Toji is a simple yet effective Japanese bookbinding technique that is valued for both its functionality and traditional aesthetics. It’s a great option for artistic binding projects and creating personalized books or notebooks.
3. Tortoise Shell Binding:
Tortoise Shell Binding is a unique style of book binding that mimics the appearance of tortoise shell. Although it does not involve the actual use of tortoise shell, this binding technique is an artistic representation of this material. It is more of a creative binding technique than a functional one, typically used to create art books, limited edition books, and other high-quality design works. Here are the basic steps for creating Turtle Shell binding:
Necessary materials:
- Cardboard or cardboard sheets for the covers.
- Paper or fabric to cover the covers.
- Decorative paper that imitates the texture of tortoise shell.
- PVA glue or bookbinding adhesive.
- Brushes.
- Ruler and stylus.
- Binding thread and needle (optional).
Steps to create the Turtle Shell Binding:
- Cover Preparation:
- Cut two pieces of cardboard to the desired dimensions for the book covers.
- Glue your chosen paper or fabric onto the cardboard covers to create the outer surface of the covers.
- Preparation of Decorative Paper:
- Use decorative paper that mimics the texture of tortoiseshell. If you can’t find pre-printed paper with this texture, you can create your own texture using paints or colored pencils.
- Glue the decorative paper to the coated cardboard covers to create the tortoiseshell appearance. This can be done artistically, it doesn’t have to be perfect.
- Cutting the Inner Pages:
- Cut the inside pages of the book to the desired size and align them evenly.
- Sewing (optional):
- If you would like the book to have a stitching method to hold the pages together, you can choose to stitch them together using a binding technique of your choice, such as Japanese stitching or longstitch stitching. Make sure the pages are well aligned and sewn in the center of the covers.
- Collage of Internal Pages:
- Glue the inner pages to the covers using PVA glue or a strong binding adhesive. Press well to ensure a firm grip.
- Pressing and Drying:
- Place the book under pressure to ensure the pages and covers are well glued and dry.
Turtle Shell Binding is a technique that requires skill and patience, as creating the texture of turtle shell is a delicate and artistic process. It’s a popular technique for creating art books, limited edition books, and custom binding projects that strive for a unique, sophisticated aesthetic.
Cultural Significance and Contemporary Evolution
Japanese binding goes beyond its practical function and has a deep cultural significance. It encapsulates the Japanese philosophy of appreciating the simplicity and ephemeral nature of things. The search for harmony between form and function is a distinctive feature of Japanese bookbinding, reflecting the country’s general aesthetic.
In modern times, Japanese bookbinding has not been forgotten. On the contrary, it has experienced a significant renaissance. Artists, writers and craft enthusiasts are rediscovering traditional bookbinding techniques and adapting them for their contemporary creations.
Impact on the Arts and Beyond
Beyond the literary world, Japanese bookbinding has influenced other forms of art and design. The unique aesthetic of this technique has inspired graphic designers, illustrators, and even fashion designers. The meticulous attention to detail and pursuit of perfection found in Japanese bookbinding are qualities highly valued across many creative disciplines.
Conclusion
Japanese binding is much more than a simple method of joining pages together. It carries with it centuries of history, cultural philosophy and a deep respect for tradition. Through techniques such as Koki Toji, Yotsume Toji and tortoiseshell binding, this unique art form stands as a testament to human skill and the ability to adapt and evolve.
As interest in craftsmanship and tradition continues to grow, Japanese bookbinding maintains its place as a relevant and meaningful practice. Whether as a means of preserving valuable texts or as a contemporary artistic expression, this technique will continue to delight and inspire present and future generations. So as you leaf through the expertly bound pages of a Japanese-bound book, remember that you are holding not only knowledge, but also an important part of Japan’s rich cultural history.

